1/4c rice vinegar
1/4 cup white vinegar
1 egg yolk
1-1/2 TB dijon mustard (I used Koop's)(Grey Poupon not recommended for this particular recipe)
1-1/2 TB white sugar
1-1/2 tsp salt
1 tsp black pepper (coarse ground is ideal)
1/2 medium clove garlic, grated
zest of 1/2 lemon
one 1-1/2" to 2" wide wedge vidalia onion, grated
1 TB blue poppy seeds
1-1/2c good quality olive oil
1. Whisk together all ingredients but the olive oil and the poppy seeds until well-blended. This mixture may get foamy. That is okay. It will dissipate.
2. Continue whisking, being careful to whisk continuously and in a circular motion. Meanwhile, pour in a thin, steady stream of olive oil into the mixture while continuing to whisk in the same manner.
3. Continue this process until all of the olive oil has been blended into the dressing. You should have a nice creamy emulsion. Continue whisking while adding in the poppy seeds.
4. Once all ingredients are uniformly incorporated, taste to be sure that you do not need to adjust the salt, sugar, or mustard level. Pour into a mason jar, refrigerate and enjoy. This recipe is great the day of, but even better when made a day ahead.
All-time Most Popular Posts
-
One of my favorite foods on earth is pernil, or latin style pulled pork. It's juicy, it's citrus-y, it's herby, it has the yum...
-
 Mmmmm, kaw (kaw saik jrouk) is one of my favorite Cambodian dishes. I absolutely love it's delicious caramelized yumminess! It is...
This Week's Most Popular Posts
-
 So I made Banh chao today!! It turned out perfect!! I was soo happy! Banh chao is the Cambodian version (different only in name) of the ...
 -
 Mmmm, look how thick and fluffy! I'm not much of a eggs and bacon breakfast type of girl, so I never actually tried to...
Showing posts with label 30 minutes or less. Show all posts
Showing posts with label 30 minutes or less. Show all posts
Thursday, August 27, 2015


Thursday, August 6, 2015
Tangy, Spicy and Vibrant Indonesian-Inspired Stir Fried Noodles (Mee-Goreng-Inspired)
At times, I have been guilty of over complicating weeknight meals. I often fail to realize what I've gotten myself into until I'm too far in to turn around. I've gotten much better at this, and I have developed a great arsenal of quick and flavorful dishes for weeknights or those days when you just don't feel like cooking. Yes, I have those days, and nothing ever seems to turn out right when they come around. There are, however, exceptions. A great stir fry is my exception. No matter how rough of a night it is and no matter how much I am dying NOT to have to cook, something about stir fries just makes me happy.
This particular stir fry is like joy on a plate. It's bright, it's colorful, it's nutritious, it's addictively tangy, and it has the perfect spicy kick. It's just a can't lose kind of meal. I promise! This is my own creation that was inspired by a very popular Indonesian stir fry called mee goreng, or stir-fried noodles. I first tried this at an international food day at UVA years ago. That dish was so good that it stuck in my brain ever since, and it was many years later before I tried my hand at making it at home. It's super easy, and you have most of the things right in your pantry. What's more, if you don't have it, don't sweat it. No tamarind? Add more calamondin juice and fresh tomato.
This is such a great dish for making use of the garden's bounty. That's actually part of the reason for my making it. Don't be afraid to switch some things up. It's a versatile, easy, and delicious dish. If you're vegetarian or want an even lighter meal, cut the meat and add more veg. Carnivores, replace the chicken with shrimp or use both. I've even done this dish with two different types of noodles, rice noodles and sweet potato, but not at the same time of course. The celery sweet potato noodles are great and add to the flavor and gorgeous color of this dish, but the regular clear ones work fine too. Have fun with it!
Indonesian-Inspired Stir Fried Noodles
1 pack Korean Sweet
Potato Noodles (if available, the ones with Celery Extract, which are a gorgeous green!) boiled with a clove of garlic until al
dente, strained, and tossed with sesame oil*
Tomato ketchup (maybe around 1 cup or so), add more as needed
About ½ TB or so dark sweet soy
1 tsp tamarind paste (not the watery kind, make your own
from the block, if needed)
1 red onion, thinly sliced
Half zucchini, julienned (peel on, no seeds)
1/3 orange bell pepper, julienned
1/3 red bell pepper, julienned
About 1 cup – 1/2 c or so cooked leftover meat (ham, chicken, turkey, or a mix), chopped into thin strips or 1” cubes
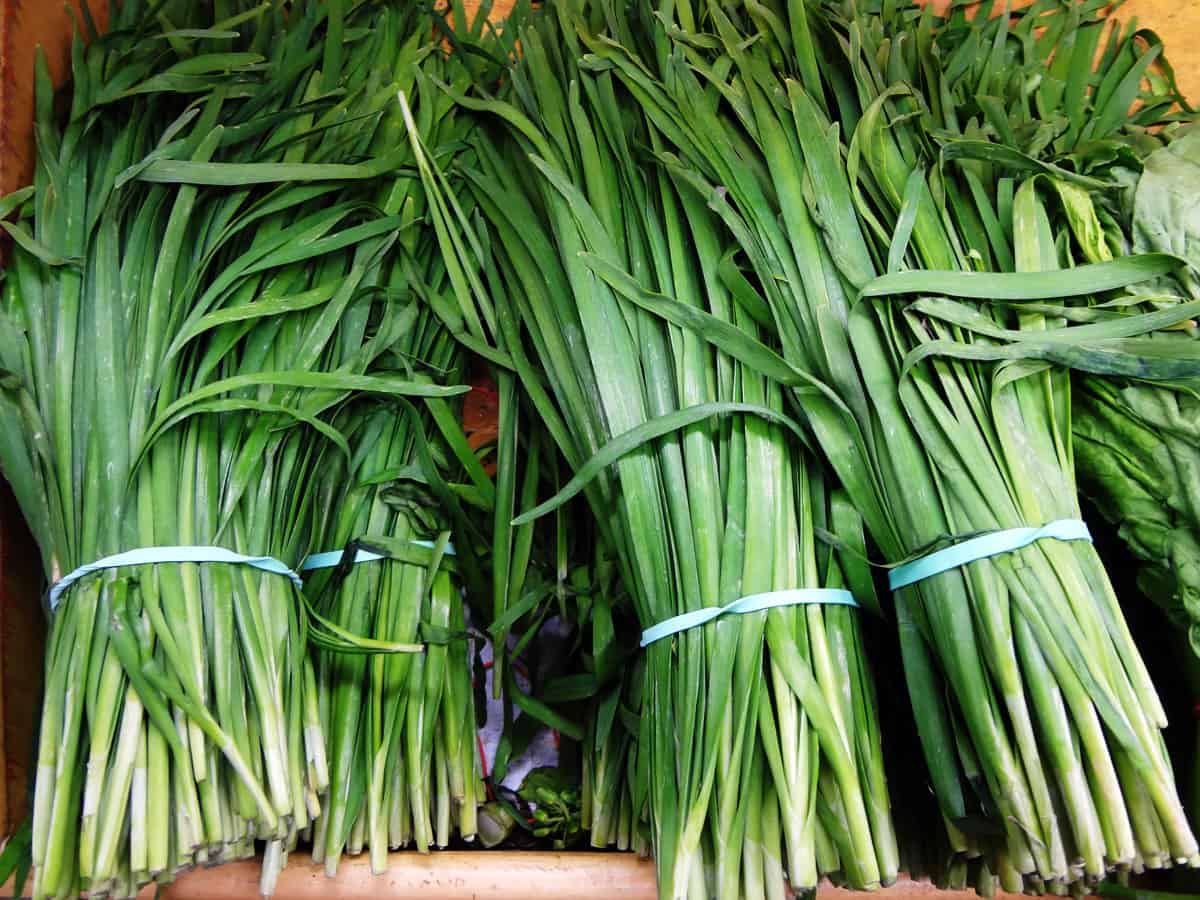
3 garlic chives, in 2” slices***
¾ pack frozen calamansi juice, thawed
2 green onions, green parts only, sliced into rounds
Splash of sesame oil
Vegetable oil for stir frying
*Roasted sesame seeds for sprinkling over final dish before serving (optional).
*Another great garnish is fresh cilantro (optional)
Seasoning paste – pound the following into a paste in a
mortar and pestle. In a pinch, food
processor.
2 heaping tsp frozen minced lemongrass***
1 slice fresh ginger
2 dried Thai peppers
2 fresh Thai peppers
4 cloves garlic
1 medium ripe tomato, in chunks (Cherry or Roma tomatoes have great
flavor for this.)
Procedure
1. Heat a large
wok over high heat.
2. Add 2 -3 TB oil and begin cooking seasoning paste,
stirring constantly, until fragrant.
3. Stir in onions and peppers and sautee until translucent.
4. Add in liquid seasoning ingredients—ketchup, dark soy,
tamarind, calamansi juice. Add in carrots
and cook a minute or so.
5. Add in meat, zucchini, garlic chives and sautee until
zucchini is soften, continue stirring constantly
6. In last minute or two, add in green onions and adjust
seasoning. Drizzle with fresh lime juice or more calamondin juice.
*You can also use the flat rice noodles (called rice
stick). You want the size used in pad
Thai, size large.
**Found in frozen section in any Filipino market and in most
SE Asian markets. It’s a sack of ketchup-packet-like
juice packets. This can be subbed with
lime or lime and pineapple juice, but you’ll definitely be missing out.
***Available at any Asian market. The lemongrass may be in the freezer or refrigerator. It's in a small, plastic container.
Tips for Newbies to Stir Fried Noodles
In terms of procedure, you must always keep ingredients moving in a stir fry because the heat is so high. Never ever walk away. Have all ingredients in bowls, chopped, poured, and ready-to-go. Mix all of the onions and peppers together in a small bowl, all liquids in a small bowl, and keep the seasoning paste together in a small bowl. Keep the bottles of liquid out and within arm's reach, as you will likely want to adjust to your preference. Once you get to adding the noodles, use two wooden spatulas to toss gently, moving from the sides and pushing down toward the bottom of the bowl, then pushing up through the center. Toss gently until noodles are tender. NEVER use plastic tools with a stir-fry. The pan is too hot. Have a pan or heat-safe bowl ready to catch the cooked stir fry because it goes from cooked to over-cooked quickly. Have a trivet ready as well to move the pan off the burner. I use a cast iron wok, but if you don't have a wok, get a deep skillet for frying, but not a pot. You'll get an unevenly-cooked mess with a pot. You need low sides for good air circulation and movement of ingredients. Also, do not reduce the oil or you'll have a sticky, burnt mess. No oil, no movement; no movement = uneven cooking and tons of sticking. You can add a TB more oil, if needed, but don't reduce. I reduced the typical amount already, so this recipe is cutting it close on oil as it is.
Friday, July 17, 2015
Portuguese-Inspired Poached Fish in Tomato Sauce
So my husband decided that he was going on a diet, and he wanted to try his hand at baking fish to get more lean protein. Inside I sighed the biggest sigh ever, and I said to him "Don't you dare leave me stuck with this bag of frozen fish. You know how I feel about that stuff." Anyway, a couple months later and nothing has been done with that fish, of course. Humbug! After living in Miami, I got really picky about seafood being fresh. I can taste it when restaurants serve frozen seafood, and it's a huge pet peeve for me, so I definitely do not buy it for my house. The only time it's tolerable for me is when it's fried, and I almost never fry food, so that wasn't happening either. Well, my husband changed all of that for me because here I was, stuck with a family size bag of frozen Whiting. *Hmph*
Time to get creative! I was not about to do baked fish sitting in yucky frozen fish juices, so that was out. I certainly wasn't frying fish either, so I had no idea what to do with the stuff. I looked online to get my creative juices going, and I saw some fish baked in tomato sauce, tomato-based fish soup, fish in New Orleans Creole tomato sauce. Okay, now that I can work with. So, I decided to create something with my roma tomatoes and add lemon to hopefully mask the frozen fish taste. Aha! Portuguese-style seafood! So, I decided to create my own recipe inspired by Portuguese flavors. I added my own twist, and below is the result--a delicious, fresh, lemony seafood in a bright tomato and wine sauce splashed with lemon. SOOO good! Not only was the frozen fish edible, but it was delicious and high-end restaurant quality. It was a complete win! Thanks to my husband, a stellar dish was born!
This dish is very informal in terms of quantities. Everything is to taste. There's no need for strict measurements here. Feel free to adjust quantities to your preferences.
Portuguese-Inspired Poached Fish in Tomato Sauce
4 whiting fillets
1 red onion, chopped
2 garlic cloves, mashed into a paste or finely minced
1 can of Hunt's no salt added diced tomatoes (crushed would work great too) or equivalent amount of Roma tomatoes
zest of about 3/4 of a lemon
fresh lemon juice
~1/2 c of dry white wine (I used Chardonnay)
1 sprig of fresh rosemary
sea salt and white pepper to taste (white pepper is smoky and much less abrasive in flavor than black. Leave pepper out of the sauce completely if you don't have white. Black is okay for the fish only. Trust me here.)
olive oil for sauteing
Procedure:
1. If frozen, thaw the fish completely and drain any liquid that remains. Cut the fillets in half, lengthwise. Season with salt, white or black pepper, all of the lemon zest, and a good drizzle of lemon juice on both sides of fish pieces. Set aside.
2. Saute the onion over medium heat, being sure to salt them well, in olive oil until softened. Once softened, add in the tomatoes, rosemary, and garlic, adjust salt, and cook until the sauce is thick and the tomatoes have broken down and become saucy.
3. Once the tomatoes break down, add in the wine. Just add until you reach the desired amount of sauce. Allow the wine taste to cook out for about 2 minutes or so.
4. Drop the temperature to medium low, add the fish directly on top of the sauce, cover, and allow it to poach for 10-12 minutes. Check it towards the end to avoid overcooking. You know when the fish is done when it flakes easily with a fork. It should not be hard, but tender and juicy.
Serve this delicious, super quick, gourmet delight with mashed, roasted, or fried potatoes, or white rice and the veggie of your choice. We had my roasted squash and tomatoes. YUM! Tell me how much you love this dish!
Time to get creative! I was not about to do baked fish sitting in yucky frozen fish juices, so that was out. I certainly wasn't frying fish either, so I had no idea what to do with the stuff. I looked online to get my creative juices going, and I saw some fish baked in tomato sauce, tomato-based fish soup, fish in New Orleans Creole tomato sauce. Okay, now that I can work with. So, I decided to create something with my roma tomatoes and add lemon to hopefully mask the frozen fish taste. Aha! Portuguese-style seafood! So, I decided to create my own recipe inspired by Portuguese flavors. I added my own twist, and below is the result--a delicious, fresh, lemony seafood in a bright tomato and wine sauce splashed with lemon. SOOO good! Not only was the frozen fish edible, but it was delicious and high-end restaurant quality. It was a complete win! Thanks to my husband, a stellar dish was born!
This dish is very informal in terms of quantities. Everything is to taste. There's no need for strict measurements here. Feel free to adjust quantities to your preferences.
Portuguese-Inspired Poached Fish in Tomato Sauce
4 whiting fillets
1 red onion, chopped
2 garlic cloves, mashed into a paste or finely minced
1 can of Hunt's no salt added diced tomatoes (crushed would work great too) or equivalent amount of Roma tomatoes
zest of about 3/4 of a lemon
fresh lemon juice
~1/2 c of dry white wine (I used Chardonnay)
1 sprig of fresh rosemary
sea salt and white pepper to taste (white pepper is smoky and much less abrasive in flavor than black. Leave pepper out of the sauce completely if you don't have white. Black is okay for the fish only. Trust me here.)
olive oil for sauteing
Procedure:
1. If frozen, thaw the fish completely and drain any liquid that remains. Cut the fillets in half, lengthwise. Season with salt, white or black pepper, all of the lemon zest, and a good drizzle of lemon juice on both sides of fish pieces. Set aside.
2. Saute the onion over medium heat, being sure to salt them well, in olive oil until softened. Once softened, add in the tomatoes, rosemary, and garlic, adjust salt, and cook until the sauce is thick and the tomatoes have broken down and become saucy.
3. Once the tomatoes break down, add in the wine. Just add until you reach the desired amount of sauce. Allow the wine taste to cook out for about 2 minutes or so.
4. Drop the temperature to medium low, add the fish directly on top of the sauce, cover, and allow it to poach for 10-12 minutes. Check it towards the end to avoid overcooking. You know when the fish is done when it flakes easily with a fork. It should not be hard, but tender and juicy.
Serve this delicious, super quick, gourmet delight with mashed, roasted, or fried potatoes, or white rice and the veggie of your choice. We had my roasted squash and tomatoes. YUM! Tell me how much you love this dish!
Saturday, May 30, 2015
Cuban Frita Burgers
When I lived in Miami, there were burgers of all kinds--Korean Fusion burgers from Sakaya Kitchen and their delicious food truck, there were Colombian burgers with sweet and savory sauces of all varieties imaginable, and Cuban burgers, called fritas. While Colombian burgers were probably my favorite, the frita (free.tah) is the most practical to make at home with ease. These burgers are smoky and garlicky with a nice sweet zip from the ketchup. You definitely do not need any sauces or anything like that on these burgers, as they are packed with flavor. Cheese is optional, but potato stix are a must.
These red-tinged burgers are aromatic and irresistible and are sure to please your guests. Even the pickiest eater will be won over by this Cuban treat. If you're lucky, you can go old fashioned and sub the ground pork for Spanish chorizo. Be careful here as it must be Spanish, not Mexican chorizo. You want that nice paprika-laced sausage that isn't the least bit spicy. In Miami, they sell ground Spanish chorizo in the pack, just as you can buy ground beef here. If you can find Spanish chorizo around, it's even better. Either way, you're in for a real treat! I hope this delicious frita becomes a staple in your home, just as it is in mine. For me, it's the only way to eat a burger at home, well...this and portabella mushroom and beef combo. Enjoy!
Cuban fritas
Ingredients
1/2 - 3/4 lb ground pork
1 lb ground beef
2-3 TB ketchup (or 2 TB tomato paste can also work)
5 cloves garlic, minced
1/3 onion, finely diced
1 tsp cumin
1-1/2 tsp paprika
1 tsp salt
1 TB cilantro leaves (measure before chopping) then chop (most people don't use this, but I love it)
Procedure
1.Mix together by hand all ingredients above and grill as normal.
2. Top the burgers with shoestring potato stix, a slice of cheese. Typically, you use American cheese, but I like provolone too. In fact, I like to use one slice of each, yum!
References for inspiration
http://insightcuba.com/blog/2013/02/08/recipe-of-the-week-frita-cubana-the-cuban-hamburger
These red-tinged burgers are aromatic and irresistible and are sure to please your guests. Even the pickiest eater will be won over by this Cuban treat. If you're lucky, you can go old fashioned and sub the ground pork for Spanish chorizo. Be careful here as it must be Spanish, not Mexican chorizo. You want that nice paprika-laced sausage that isn't the least bit spicy. In Miami, they sell ground Spanish chorizo in the pack, just as you can buy ground beef here. If you can find Spanish chorizo around, it's even better. Either way, you're in for a real treat! I hope this delicious frita becomes a staple in your home, just as it is in mine. For me, it's the only way to eat a burger at home, well...this and portabella mushroom and beef combo. Enjoy!
Cuban fritas
Ingredients
1/2 - 3/4 lb ground pork
1 lb ground beef
2-3 TB ketchup (or 2 TB tomato paste can also work)
5 cloves garlic, minced
1/3 onion, finely diced
1 tsp cumin
1-1/2 tsp paprika
1 tsp salt
1 TB cilantro leaves (measure before chopping) then chop (most people don't use this, but I love it)
Procedure
1.Mix together by hand all ingredients above and grill as normal.
2. Top the burgers with shoestring potato stix, a slice of cheese. Typically, you use American cheese, but I like provolone too. In fact, I like to use one slice of each, yum!
References for inspiration
http://insightcuba.com/blog/2013/02/08/recipe-of-the-week-frita-cubana-the-cuban-hamburger
Sunday, February 23, 2014
Jamaican Jerk Marinade--Revised
Jamaican Jerk Marinade
Ingredients
2 TB salt
1 onion
1/2tsp black pepper
1/2c orange juice (I had tangerine, so I just used that)
1 tsp cinnamon
1 tsp nutmeg
2 tsp ground allspice
2 tsp ground allspice
1 tsp grated fresh ginger
¼ c White vinegar
4 scallions (I had only had two, so that's what I used)
5 sprigs fresh thyme or equivalent amount dried thyme (fresh is MUCH better!)
5 sprigs fresh thyme or equivalent amount dried thyme (fresh is MUCH better!)
7 cloves garlic
2 TB soy sauce
1/2c packed brown sugar
2-3 habanero peppers
1/4c oil
Procedure
1. Blend all ingredients in food processor until they form a
smooth puree. You can keep the marinade on hand for later use or freeze it. It actually preserves well in the fridge.
2. In a foil-lined roasting pan, which you will also use for cooking, marinade chicken or pork for a minimum of two hours or up to overnight. Let meat reach room temperature before placing in 400F oven or, even better, on a charcoal grill.
3. If preparing meat in oven, cook uncovered for one hour then broil, turning meat occasionally for about 5 min, or so until you get charred edges on all sides. You need the sugars to caramelize for a good jerk.
Resources:
http://homecooking.about.com/od/condimentrecipes/r/blsauce13
Monday, December 23, 2013
Jewish Cranberry Holiday Chutney
When I lived in Northern Virginia, one of my absolute favorite places to eat was Chutzpah (HOOTZ pah) Deli in Fairfax. It is a delicious New York-style Jewish deli owned by former New Yorkers who just love cooking and serving up great food. The food is hearty, and tastes like someone's grandma is cooking in the kitchen, portions are huge, and quality is great. It's the type of food that you'd be proud to serve your family.
Well, one of my favorite dishes from Chutzpah was their open-faced brisket and gravy sandwich with mashed potatoes and cranberry chutney. Talk about gooooood! Inspired by Chutzpah and a recipe from one of my favorite cookbooks, New Kosher Cuisine, by Mollie Katzen, this recipe is a real hit with everyone who is fortunate enough to try it. It's fresh, it's healthy, and it has just the right touch of cinnamon to make you feel warm and cozy, and loved by someone special. Try it for yourself, and it's sure to be a real hit! This recipe alone is the reason why I stock up on fresh cranberries to freeze so that I can enjoy this deliciousness year round.
"How do I eat it?" and "what do I eat it with?" you might ask. Well, you can eat it with your turkey if you feel so inclined, but I love it by itself as a snack or an after-dinner treat. I love it on my holiday plate as a side, and I love it as a healthy snack with lunch. In the Jewish deli, it's sold alongside hearty sandwiches. You can enjoy this dish sweet or savory, and even with your morning oatmeal or yogurt. I am not a cranberry sauce person, even when it's good cranberry sauce, but this is just a dream-of-a-dish. It's a simple way to wow anyone at your next family gathering. It is truly fabulous on a plate and, for me, the only reason to stockpile those bags of fresh holiday cranberries in your freezer to enjoy a taste of this dish all year round. If you can't cook, you will shock them and prove them all wrong if you show up with this very special treat. Well, enough talking...get cooking!
Jewish Cranberry Chutney
1 bag of cranberries (fresh or frozen)
about 2 c sugar (taste it as you add. It should still be tart.)
Scant ½ c combo of tangerine, orange or fresh pineapple juice* (I find just 2-3 TB works better)
1 cinnamon stick
1c coarsely chopped walnuts
About 1-1/2 c chopped fresh pineapple
Segments from 3 tangerines (you will use their juice above)
Procedure
1. Place first 4 ingredients in a pot over low to medium -low heat. Be sure to add sugar in portions, as you may need less, depending on sweetness of fruit. You want the end result to be tangy, not flat and all sweet only.
2. Allow to simmer for 12-15 minutes, or until cranberries burst. Don't rush the process by turning up the heat, or your cranberries will be tough and bitter.
3. Remove the cinnamon stick.
4. Stir in pineapple, tangerine, and walnuts.
4. Stir in pineapple, tangerine, and walnuts.
5. Refrigerate until cool and serve or freeze for later use.
Note: This has great shelf life if you can keep yourself from eating it!
This is a great recipe to play around with. Substitute pecans for the walnuts. Use pineapple or orange juice instead of tangerine. Use canned mandarins instead of fresh citrus. Use cloves or allspice in place of cinnamon stick. This is a super versatile and forgiving recipe. Have fun with it!
Enjoy!
Enjoy!
Wednesday, October 16, 2013
Hearty Ground Beef and Veggie Chili
Hearty Ground Beef and Veggie Chili
Ingredients:
Ingredients:
1lb ground beef
1 handful baby carrots and 1 stalk celery, sautéed until
softened and pureed with a couple TB water
1 medium onion, chopped
1 medium bell pepper, chopped
3 red serrano peppers, thinly sliced
3-4 cloves garlic, smashed
3 fresh tomatoes, chopped
2 heaping TB tomato paste
½ TB cumin
½ tsp cinnamon
1 pinch oregano
1 tsp chilli pepper
¼ tsp Mexican style hot chili powder
A few dashed Hungarian hot paprika
2tsp cocoa powder
2 maggi chicken bouillon cubes, dissolved in ½-1c water
2 TB maseca
1 cup chopped portabello mushroom
Lots of salt
Few Dashes of pepper
Procedure:
1. In a small pan, sautee the onions, bell pepper, and serrano peppers in a TB lard or vegetable oil until translucent. Stir in garlic and sautee until fragrant.
2. Meanwhile, over medium heat, sautee ground beef, being sure to break up the beef with a spatula, until it begins to brown. Strain oil off. Stir in onion mixture, tomato paste, and carrot mixture. Sautee for a few minutes.
3. Stir in dry seasoning and continue cooking.
4. Once beef is almost done, taste for salt and stir in chicken bouillon and maseca.
5. Once beef is done, stir in portabello and chopped tomatoes. Continue cooking until veggies have softened a bit, but still have bite, and the beef is fully cooked.
Saturday, August 31, 2013
The Easiest Dinner Ever AKA Smoky Chickpea and Tomato Soup
Ever wonder what in the world to do with all of that juice on the bottom of the roasting pan after baking a ham? I say keep it and freeze it up! It's one of the best things you could have on hand for the tastiest bean soups all season long. We made ham last month and, since I was craving chickpeas, not to mention a super quick dinner after a stressful week of getting ready for the kids to come back to school, I decided to whip out my trusty ham broth. Few things make a bigger flavor impact with minimal effort than leftover ham broth. I say keep the bone and use it to make a stock or throw it into beans, cabbage, or greens too. Works like a charm each and every time! Since I also stock up on red, yellow, and orange bell peppers when they are on sale, quarter them, and freeze them too, this recipe was a breeze. Cuban-inspired, but done to my tastes, you and your family are sure to enjoy this dish with my favorite legume--chickpeas! So here it is, a quick and easy, hearty recipe for protein-packed chickpea and tomato soup. It's so easy, your kids can cook dinner for you for a change ;)!
Smoky Chickpea and Tomato Soup
Ingredients:
1/2c – 3/4 c dried chickpeas, soaked overnight with ½ tsp
baking soda and drained
Mixed bell peppers (mixed red, orange, and yellow bell peppers, equiv. of 1 whole pepper), in
quarters
½ large white onion, in quarters
1 can spicy red pepper diced tomatoes
4 cloves garlic, minced
About 1 tsp paprika
1/2 tsp cumin
1 bay leaf
Black pepper to taste
1-1/2 c Seasoned homemade ham broth, already brought to a rolling
boil in a separate pot (do not use packet, use a ham bone and water)*
**
*Add more or less broth to your taste for a thicker or thinner soup
**My ham broth was seasoned very well, so I didn't need any salt.
Spice Things Up!
If you want to switch it up a bit, try adding in bite-sized beef or lamb chunks, or even potatoes, yuuuuum!
Procedure:
1. Stir together all ingredients and allow to cook on low for about
5 hours, or until the chickpeas are tender, not mushy or falling apart.
2. Remove bay leaf. You may wish to remove the onion and bell pepper as well, leave it in, or puree it and add it back to the soup. Whatever you choose, serve with steamed white rice and enjoy!
Tuesday, August 6, 2013
Spicy Cameroonian-style Grilled Marinated Fish *Poisson braise alla camerounaise*
Ingredients
enough mildly flavored white fish for four people (I like to use swai)
3 TB vegetable oil
1/4 large onion
3 cloves garlic
1 small plum tomato
1 handful parsley (about 1/4, stems and all)
1 small piece of ginger (about a 1" piece)
about 1 tsp or so salt
2-3 tsp pebe (cameroonian homemade hot sauce) *
*If you don't have this, simply add in 1/4 habanero pepper.
Procedure:
1. Preheat oven to high broil. You will broil the fish uncovered for about 15 minutes.
2. Place all ingredients in blender until very smooth and uniform. You do not want any chunks.
3. Oil pan well with vegetable oil. Pat fish dry with paper towels. Brush fish with marinade on one side. Halfway through cooking, flip fish gently using two spatulas and brush other side with marinade.
4. Check fish for flakiness with a fork. Once the flesh flakes easily, it is done.
References: http://blogauxpoils.over-blog.com/article-32100488.html
enough mildly flavored white fish for four people (I like to use swai)
3 TB vegetable oil
1/4 large onion
3 cloves garlic
1 small plum tomato
1 handful parsley (about 1/4, stems and all)
1 small piece of ginger (about a 1" piece)
about 1 tsp or so salt
2-3 tsp pebe (cameroonian homemade hot sauce) *
*If you don't have this, simply add in 1/4 habanero pepper.
Procedure:
1. Preheat oven to high broil. You will broil the fish uncovered for about 15 minutes.
2. Place all ingredients in blender until very smooth and uniform. You do not want any chunks.
3. Oil pan well with vegetable oil. Pat fish dry with paper towels. Brush fish with marinade on one side. Halfway through cooking, flip fish gently using two spatulas and brush other side with marinade.
4. Check fish for flakiness with a fork. Once the flesh flakes easily, it is done.
References: http://blogauxpoils.over-blog.com/article-32100488.html
Monday, July 29, 2013
Tropical Cobb Salad
Tropical Cobb Salad
1 large ripe mango, cut into chunks
1 medium-sized ripe avocado, cut into chunks
1 whole chicken breast, marinated, grilled, and chunked
feta, goat cheese, or blue cheese, crumbled (I used Loralie blueberry goat cheese with vanilla)
3 hard boiled eggs, sliced into chunks
5 slices of bacon, crumbled
a mixture of red lettuce, spinach leaves, cilantro (stems removed), chopped and washed thoroughly
light, tangy dressing of choice
Tangy Citrus Vinaigrette
1-1/2 TB white balsamic vinegar
1 TB fresh orange juice
1 TB fresh lemon juice
zest of 1/2 lemon
zest of 1/2 orange
1/2 garlic clove, grated
1/4 tsp black pepper
1 rounded tsp salt
10 shakes of cayenne pepper
9 TB grape seed or olive oil
Chicken Marinade
3 green onions
1/4 red bell pepper
1/4 onion
1/2" piece of ginger
1/4 habanero pepper
1/4 tomato
1 heaping teaspoon salt
pepper to taste
1 TB olive oil
1 sprig fresh thyme, stems removed
Procedure
1. Allow chicken to marinate for at least an hour.
2. Grill or bake chicken. I used my Foreman grill. Cut into chunks.
3. When serving, toss desired portion of greens in light amount of dressing. Top with a few chunks of the following: eggs, avocado, mango, and a good portion of chicken. Top with crumbled cheese and bacon. Drizzle a little dressing. Enjoy :)
1 large ripe mango, cut into chunks
1 medium-sized ripe avocado, cut into chunks
1 whole chicken breast, marinated, grilled, and chunked
feta, goat cheese, or blue cheese, crumbled (I used Loralie blueberry goat cheese with vanilla)
3 hard boiled eggs, sliced into chunks
5 slices of bacon, crumbled
a mixture of red lettuce, spinach leaves, cilantro (stems removed), chopped and washed thoroughly
light, tangy dressing of choice
Tangy Citrus Vinaigrette
1-1/2 TB white balsamic vinegar
1 TB fresh orange juice
1 TB fresh lemon juice
zest of 1/2 lemon
zest of 1/2 orange
1/2 garlic clove, grated
1/4 tsp black pepper
1 rounded tsp salt
10 shakes of cayenne pepper
9 TB grape seed or olive oil
Chicken Marinade
3 green onions
1/4 red bell pepper
1/4 onion
1/2" piece of ginger
1/4 habanero pepper
1/4 tomato
1 heaping teaspoon salt
pepper to taste
1 TB olive oil
1 sprig fresh thyme, stems removed
Procedure
1. Allow chicken to marinate for at least an hour.
2. Grill or bake chicken. I used my Foreman grill. Cut into chunks.
3. When serving, toss desired portion of greens in light amount of dressing. Top with a few chunks of the following: eggs, avocado, mango, and a good portion of chicken. Top with crumbled cheese and bacon. Drizzle a little dressing. Enjoy :)
Sunday, May 26, 2013
Delicious Red Lentil Soup My Way
Ingredients
5 cups water
1 cup dried red lentils*
1 white or vidalia onion, chopped
2 cups chopped potatoes
1/4 red bell pepper, chopped
2 garlic cloves, left whole
1 indian finger chilli, chopped in half, width-wise
1 tsp fresh ginger, sliced
1 TB tomato paste
2 tsp salt
1/3 c chopped fresh cilantro, stems removed
*Found at your local Indian market
Procedure
1. Add first all ingredients, except cilantro, to a pot, cover and bring to a boil.
2. Lower heat and simmer 15-20 minutes or until lentils and vegetables are tender.
3. Stir in chopped cilantro.
4. Puree to desired texture in small batches in a blender or using an immersion blender. Enjoy.
References: http://www.food.com/recipe/egyptian-red-lentil-soup-94673
5 cups water
1 cup dried red lentils*
1 white or vidalia onion, chopped
2 cups chopped potatoes
1/4 red bell pepper, chopped
2 garlic cloves, left whole
1 indian finger chilli, chopped in half, width-wise
1 tsp fresh ginger, sliced
1 TB tomato paste
2 tsp salt
1/3 c chopped fresh cilantro, stems removed
*Found at your local Indian market
Procedure
1. Add first all ingredients, except cilantro, to a pot, cover and bring to a boil.
2. Lower heat and simmer 15-20 minutes or until lentils and vegetables are tender.
3. Stir in chopped cilantro.
4. Puree to desired texture in small batches in a blender or using an immersion blender. Enjoy.
References: http://www.food.com/recipe/egyptian-red-lentil-soup-94673
Sunday, April 28, 2013
Traditional French Fluffy Almond Sponge Cake - Financier aux amandes
A financier is another one of those things that I had heard of, but never actually seen or tasted before I made it myself. I had heard of chefs making financiers, whatever that was, and people made it sound so delicious, but I was skeptical. I like the nice, moist style of cakes that I would argue that we Americans do better than Europeans. The European sponge-y style of say, the genoise, or the panetela is just not my thing. Dry, airy sponge cakes will never be my fancy, no matter how much fat they pack into them. Financiers, however, are different. How did I know? I looked at the ratio of fat to dry ingredients, as well as the absence of egg yolks, which was awesome. The high percentage of yolks is what creates the dry sponge cake texture that I typically try to avoid in my kitchen.
After looking at a few yummy recipes in my Desserts Festifs cookbook by Sylvie Ait-Alie that I ordered on Amazon France (thank you, global marketplace), I decided that a financier actually looked like the perfect dessert endeavor for my weekend. I did not, however, opt to use a recipe from this book, as these are fancier cakes that use financiers as the base. I just wanted to try the basic financier first to ensure that I would like it before I made a more fanciful creation down the road.
After Googling some recipes in French, this is a translation of the recipe I used. The result was the perfect, dainty little cake with a beautiful golden crust, and an other-worldy soft and fluffy interior. The texture reminds me more of a moist chiffon cake than a sponge cake, although technique-wise, it is a sponge. Because of all of the egg whites, there is no need for leavening, and the almond and brown butter provide enough flavor that vanilla is unnecessary. This cake is characterized by a light almond flavor and a nutty background flavor, thanks to the brown butter. Simple, easy-to-make, and delightful, this cake is sure to be a crowd pleaser at your next brunch, tea party, or elegant shower. Take advantage and take it to the next level using a variety cute mini brioche pans, mini loaf pans, or diamond shaped mini loaf pans for added elegance.
Financier aux amandes
Ingredients:50g white AP flour
50g almond flour*
130g powdered sugar
4 egg whites
70g butter
*You can make this yourself using chopped skin-on almonds, chopped blanched almonds, or slivered almonds ground into a uniform flour in the blender, coffee grinder, or food processor. Simply sift and re-process any chunks that do not pass through the strainer.
Procedure:
1. Preheat oven to 375 and grease pans well with shortening.
2. Chop butter into pieces and melt in a small sauce pot over medium-low to medium heat. Allow to continue boiling until a light golden brown color is achieved. Swirl the pan occasionally throughout this process. If any bits form at the bottom of the pan, be sure to strain them out well.
3. Using a fork or a whisk, blend together the AP flour, almond flour, and powdered sugar. Set aside.
4. Beat in egg whites with an electric mixer until well-blended.
5. Once butter is browned, allow to cool slightly before using electric mixer to incorporate into batter.
6. Bake cakes for 15-20 minutes, until golden brown on the edges and cake begins to separate from the sides of pan. Cake is done once it passes spring test, but you may brown further, if desired.
7. Remove cake from pan immediately after baking and allow to cool. This is not the type of cake that you want to taste while hot, as it will taste eggy. This taste will dissipate once the cake has cooled. Cool completely and enjoy :).
I think next time I will add in some lemon zest and almond flavoring to create a bolder flavor, as the cake already tastes like vanilla. The cake has a simple tastiness to it, as is.
Variations:
add some lemon zest, add 1/2 tsp vanilla extract, add 1/2 tsp almond extract, add a combination of extracts, drop sliced almonds over the top of each cake before baking, top with sweetened fresh berries before baking
References:
http://www.lesfoodies.com/lafeecrochet/recette/financier-facon-cyril-ligniac
http://www.750g.com/recettes_financiers.htm --video recipe
Thursday, April 4, 2013
Mmm, mmm Delicious Creamed Corn
I absolute love old Southern food. It makes me feel so comforted. I feel in touch with my past by cooking the foods of my ancestors. I can almost see my great grandmother standing over the stove cooking the same dishes for her family. There is something so intimate about sharing your history through food.
Creamed corn is an old-fashioned Southern favorite in every sense. It uses ingredients easily found locally with simple flavors that pack a huge punch. It's a amazing what a little bacon grease can do. I added in the bite of cayenne, and it makes all the difference! This is not intended to be a sweet creamed corn, although those versions exist too. This is a smoky creamed corn with a spicy bite in the background, and just enough sugar to enhance the corn flavor, not mask it.
6 ears of corn*
2 TB bacon grease (no subs!)
1/2c of water **
1/2 - 3/4c milk
1 rounded tsp sugar
1/4 - 1/2 tsp cayenne pepper
generous amount of salt and pepper to taste
2 TB flour
*or about 3 cups or less of frozen corn. No canned!
**If using frozen corn, use water reserved from briefly boiling corn to thaw.
Procedure
1. Scrape off corn kernels, if using fresh corn. If using frozen corn, cover corn with water in a pan and bring to a boil, uncovered. Boil for 3 minutes to thaw.
2. Heat a pan over medium heat. Meanwhile, blend together milk, water, flour, sugar, cayenne, salt, and pepper. Stir in corn.
3. Once pan is hot, add oil. Once oil is hot, pour in corn mixture.
4. Cook over medium heat for 15 minutes, stirring very frequently to prevent sticking or clumping. If the mixture becomes too thick, simply add additional milk or water.
5. Towards the end of the cooking time, taste and adjust seasoning as appropriate.
6. Serve with another old-fashioned Southern favorite, such as pork chops, fried chicken, pork neck bones, navy bean soup, or anything else your heart may desire. Yum, yum, yum!
Cuban Style Churros *Churros Cubanos*
Living in Miami, churros were one of those very special iconic treats. Although churro shops were a dime a dozen, nothing is like a good Cuban churro, the best of which everyone knows is found only at King's Ice Cream on Calle 8. Go figure. King's is a Cuban style ice cream spot known more for it's churros than anything else. I was a sucker for the churros with guava sauce, yum, yum, YUM!
King's is one of those old school spots that has been there since the beginning of time. As they say is the case in most places in Cuba, they have kept everything original at this Miami mainstay, right down to the churro machine and the water fountain. King's isn't the prettiest place on the block; in fact, you'd walk right by it without thinking twice, but anyone who lives in Miami knows that it's the place to go in Little Havana for some great churros.
Here's a recipe that I found for traditional Cuban style churros. This style of churros is nothing like the Mexican version. They are more airy and have a thinner crisp than their Mexican cousins, much akin to the traditional Spanish churro. I think they are far superior in texture and, ironically, they contain almost no added fat in the batter. They're simple, easy-to-make, and absolutely delicious. Make this easy yet impressively delicious treat for your friends and family, and they're sure to disappear!
Churros cubanos
Ingredients
1c flour
1c water (some people will use water and half milk)
1/2 tsp butter
1/2 tsp salt
just enough oil for deep frying
granulated sugar for dusting
1 pastry bag or large ziplock with the corner snipped out.
a 1M decorating tip (very cheap and at any craft or baking store)
Procedure
1. Heat oil over med high heat, 390F, if you have a thermometer.
2. In a separate pot, place water, butter, and salt in a pot and allow it to reach a rapid boil.
3. Once water is at a rapid boil, add in all of the flour at once, remove pan from heat and stir mixture briskly with a wooden spoon until a smooth dough is achieved. The dough will be very thick, so your arms may tire quickly.
4. Insert tip in piping bag, load it up with dough (not more than 1/2 to 3/4 for optimal control)
5. Begin piping churros onto a plate in prep for frying.
6. Once oil is very hot, carefully lift churros off of plate and fry until light golden brown, being sure not to overcrowd pot.
7. Drain on paper towels. Sprinkle generously with granulated sugar and serve immediately.
8. Serve with chunky strawberry glaze or traditional hot chocolate sauce, if desired, or enjoy with just sugar. Yum!
*Yields about 20 medium length churros, enough for 3or 4 people
References:
http://tasteofcuba.com/forums/index.php?showtopic=71
http://platostradicionales.blogspot.com/2013/02/receta-para-hacer-churros.html
King's is one of those old school spots that has been there since the beginning of time. As they say is the case in most places in Cuba, they have kept everything original at this Miami mainstay, right down to the churro machine and the water fountain. King's isn't the prettiest place on the block; in fact, you'd walk right by it without thinking twice, but anyone who lives in Miami knows that it's the place to go in Little Havana for some great churros.
Here's a recipe that I found for traditional Cuban style churros. This style of churros is nothing like the Mexican version. They are more airy and have a thinner crisp than their Mexican cousins, much akin to the traditional Spanish churro. I think they are far superior in texture and, ironically, they contain almost no added fat in the batter. They're simple, easy-to-make, and absolutely delicious. Make this easy yet impressively delicious treat for your friends and family, and they're sure to disappear!
Churros cubanos
Ingredients
1c flour
1c water (some people will use water and half milk)
1/2 tsp butter
1/2 tsp salt
just enough oil for deep frying
granulated sugar for dusting
1 pastry bag or large ziplock with the corner snipped out.
a 1M decorating tip (very cheap and at any craft or baking store)
Procedure
1. Heat oil over med high heat, 390F, if you have a thermometer.
2. In a separate pot, place water, butter, and salt in a pot and allow it to reach a rapid boil.
3. Once water is at a rapid boil, add in all of the flour at once, remove pan from heat and stir mixture briskly with a wooden spoon until a smooth dough is achieved. The dough will be very thick, so your arms may tire quickly.
4. Insert tip in piping bag, load it up with dough (not more than 1/2 to 3/4 for optimal control)
5. Begin piping churros onto a plate in prep for frying.
6. Once oil is very hot, carefully lift churros off of plate and fry until light golden brown, being sure not to overcrowd pot.
7. Drain on paper towels. Sprinkle generously with granulated sugar and serve immediately.
8. Serve with chunky strawberry glaze or traditional hot chocolate sauce, if desired, or enjoy with just sugar. Yum!
*Yields about 20 medium length churros, enough for 3or 4 people
References:
http://tasteofcuba.com/forums/index.php?showtopic=71
http://platostradicionales.blogspot.com/2013/02/receta-para-hacer-churros.html
Monday, April 1, 2013
Chunky Strawberry Glaze for Cakes and Pastry
Ever go to the supermarket and see that strange, fruitless, "strawberry" glaze near the strawberry section in the produce aisle? Well, it's weird folks, just weird--looks weird, tastes weird, smells weird. It's weird. Anyhow, it's so easy to make your own, so why not! It's cheap, easy, versatile, and a true crowd pleaser. Drizzle it over bunt cakes or ice cream, use it as a filling for a layer cake, or even a donut. You can even use it to top unsweetened plain yogurt for an amazing breakfast or afternoon treat! Yum, yum, yum! Well, here it is, homemade strawberry glaze. Enjoy!
Chunky Strawberry Glaze
Ingredients
2-1/2c washed and hulled strawberries, mashed with a potato masher
1 c water
1/2 c sugar
2 tsp fresh lemon juice, lime juice, or 2 tsp cointreau or triple sec (optional)
2 rounded tsp cornstarch
Procedure
1. Cook for 10 minutes over medium heat, stirring frequently, and being sure to taste for sweetness.
2. In the last few minutes of cooking, add two rounded teaspoons of cornstarch to a mug and whisk in cool water to form a slurry. Once homogeneous, stir into hot strawberry mixture. Bring to a boil for a few more minutes.
3. Remove from heat and stir in add in 1/2 cup chopped or sliced strawberries. The result should be almost like a looser preserves. When used to top cakes, it cascades just slightly over the sides to create an elegant effect without being too runny.
4. Enjoy this delicious topping over cheesecake, angel food cake, chiffon cake, or any other pastry or cake that could use a fresh fruit kick.
Inspired by: http://thesweetmaison.blogspot.com/2011/05/chocolate-cake-with-strawberry-mousse.html
Chunky Strawberry Glaze
Ingredients
2-1/2c washed and hulled strawberries, mashed with a potato masher
1 c water
1/2 c sugar
2 tsp fresh lemon juice, lime juice, or 2 tsp cointreau or triple sec (optional)
2 rounded tsp cornstarch
Procedure
1. Cook for 10 minutes over medium heat, stirring frequently, and being sure to taste for sweetness.
2. In the last few minutes of cooking, add two rounded teaspoons of cornstarch to a mug and whisk in cool water to form a slurry. Once homogeneous, stir into hot strawberry mixture. Bring to a boil for a few more minutes.
3. Remove from heat and stir in add in 1/2 cup chopped or sliced strawberries. The result should be almost like a looser preserves. When used to top cakes, it cascades just slightly over the sides to create an elegant effect without being too runny.
4. Enjoy this delicious topping over cheesecake, angel food cake, chiffon cake, or any other pastry or cake that could use a fresh fruit kick.
Inspired by: http://thesweetmaison.blogspot.com/2011/05/chocolate-cake-with-strawberry-mousse.html
Monday, January 7, 2013
Multi-Grain Muffins **Low Iodine and Almost Vegan**
This is yet another find for low iodine and vegan diets. It's not for everyone, but I happen to love grains of all kinds. If you like bran muffins and multi-grain bread then you'll love these muffins. They are packed with nutrition and are very tasty.
Ingredients:
Streusel
1/2 c multi-grain oatmeal
5 TB brown sugar (1/4 c + 1 TB)
2 TB oil or softened vegetable margarine
1.5 tsp cinnamon
Muffins
1 c multi-grain oatmeal
1-1/2 c white flour
1 tsp baking powder
1/2 tsp baking soda
1 tsp cinnamon
2 TB shredded frozen coconut (Walmart, Asian market, Latin market)
2 tsp vanilla
1 cup unsweetened natural applesauce
2 TB honey
1/2 c coconut milk
1/4c - 1/3 c chopped walnuts or pecans
1/4 cups raisins (optional)
1/2 c + 2 TB brown sugar
1/4 c vegetable oil
2 egg whites
Procedure:
1. Preheat oven to 400 degrees.
2. Line a muffin pan with baking cups
3. Prepare topping by blending brown sugar, oats, oil or margarine, mixing well.
4. Prepare muffins by combining flour, oats, baking soda, baking powder, salt, and cinnamon. In a separate bowl, blend egg whites, applesauce, coconut milk, brown sugar, and oil.
5. Stir in dried coconut, nut, and raisins, if using.
6. Fill the cups with a spoon of batter, just enough to cover the bottom.
7. Spoon in a layer of streusel.
8. Fill the cups 3/4 of the way full with more batter.
9. Bake 18 minutes, or until golden brown on the edges.
References: http://www.countrychoiceorganic.com/products/recipes/
Ingredients:
Streusel
1/2 c multi-grain oatmeal
5 TB brown sugar (1/4 c + 1 TB)
2 TB oil or softened vegetable margarine
1.5 tsp cinnamon
Muffins
1 c multi-grain oatmeal
1-1/2 c white flour
1 tsp baking powder
1/2 tsp baking soda
1 tsp cinnamon
2 TB shredded frozen coconut (Walmart, Asian market, Latin market)
2 tsp vanilla
1 cup unsweetened natural applesauce
2 TB honey
1/2 c coconut milk
1/4c - 1/3 c chopped walnuts or pecans
1/4 cups raisins (optional)
1/2 c + 2 TB brown sugar
1/4 c vegetable oil
2 egg whites
Procedure:
1. Preheat oven to 400 degrees.
2. Line a muffin pan with baking cups
3. Prepare topping by blending brown sugar, oats, oil or margarine, mixing well.
4. Prepare muffins by combining flour, oats, baking soda, baking powder, salt, and cinnamon. In a separate bowl, blend egg whites, applesauce, coconut milk, brown sugar, and oil.
5. Stir in dried coconut, nut, and raisins, if using.
6. Fill the cups with a spoon of batter, just enough to cover the bottom.
7. Spoon in a layer of streusel.
8. Fill the cups 3/4 of the way full with more batter.
9. Bake 18 minutes, or until golden brown on the edges.
References: http://www.countrychoiceorganic.com/products/recipes/
Monday, October 29, 2012
Zesty Sloppy Joes!
Who loves sloppy joes?! I do, I do!!! I absolutely love sloppy joes! There are few American beef dishes, if any, that are anywhere near as tempting as a well-made sloppy joe. After watching Rachel Ray make sloppy lou's on "Week in a Day" a few weeks ago, I absolutely had to make sloppy joes right away. This was my first attempt at homemade sloppy joes, and they were everything I wanted them to be and more. Bye bye Manwich, there's a mean sloppy joe in town, and you better make room!
Zesty Sloppy Joes
1.5 lbs ground chuck
1 onion, chopped
1 green pepper, chopped
1 garlic clove, minced
3/4 c - 1 c ketchup
1/4 c tomato paste
1 TB yellow mustard
1 tsp honey dijon or deli-style mustard
1 TB worcestershire sauce
1/4 c brown sugar
1 tsp chili powder and/or chipotle powder
1 tsp cayenne pepper
1/2 tsp paprika
1/2 tsp Lawry's seasoned salt
1 tsp Tony Chachere's or other creole seasoning blend (or use similar seasons that you blend yourself)
1 small pinch of oregano
1 dash cider vinegar
1 tsp black pepper
salt to taste
Procedure:
1. Sautee onions and green pepper.
2. Meanwhile, in a separate pan, sautee ground beef, draining off excess fat.
3. Once excess fat is drained, add in onion, green pepper, garlic cloves, dry seasoning and brown sugar. Continue cooking for about 2 minutes.
4. Add in vinegar, ketchup, tomato paste, mustards, and worcestershire sauce.
5. Continue cooking until beef is done and sauce thickens.
6. Serve on toasted sesame seed buns. For an extra indulgent sloppy joe, top with stretchy white cheese like provolone, mozz, or even leftover string cheese strips, YUM!
Zesty Sloppy Joes
1.5 lbs ground chuck
1 onion, chopped
1 green pepper, chopped
1 garlic clove, minced
3/4 c - 1 c ketchup
1/4 c tomato paste
1 TB yellow mustard
1 tsp honey dijon or deli-style mustard
1 TB worcestershire sauce
1/4 c brown sugar
1 tsp chili powder and/or chipotle powder
1 tsp cayenne pepper
1/2 tsp paprika
1/2 tsp Lawry's seasoned salt
1 tsp Tony Chachere's or other creole seasoning blend (or use similar seasons that you blend yourself)
1 small pinch of oregano
1 dash cider vinegar
1 tsp black pepper
salt to taste
Procedure:
1. Sautee onions and green pepper.
2. Meanwhile, in a separate pan, sautee ground beef, draining off excess fat.
3. Once excess fat is drained, add in onion, green pepper, garlic cloves, dry seasoning and brown sugar. Continue cooking for about 2 minutes.
4. Add in vinegar, ketchup, tomato paste, mustards, and worcestershire sauce.
5. Continue cooking until beef is done and sauce thickens.
6. Serve on toasted sesame seed buns. For an extra indulgent sloppy joe, top with stretchy white cheese like provolone, mozz, or even leftover string cheese strips, YUM!
Thursday, July 19, 2012
Unforgettable Southern Shrimp and Grits!
I started making shrimp and grits after trying them at Richmond's undisputed soul food restaurant king, Croakers Spot. After trying my new favorite version at Lunch, Richmond's new restauarant serving up Southern homestyle food with a twist, I figured that it was time to bring the old summer favorite. Since Croakers Spot, I have made shrimp and grits at home a number of different ways--with gravy, with beer sauce, with tomato sauce, etc. This particular version has a great summer twist from the incorporation of deliciously tangy green garden tomatoes. If you don't have green tomatoes, just use red, but just know that the green makes it even more special with its delicious sweet yet tangy flavor. My shrimp and grits has a flavorful sauce with chunks of beautiful bright green and red, juicy, fresh tomatoes along with diced onion. The light freshness of the shrimp and veggies combined with the creaminess of the grits, without the gross, heavy feeling of some restaurant grits. This dish is fresh, nutritious, and bursting with flavor. It's sure to be your next family favorite!
Ingredients
*If you like leftovers or have a larger, double this recipe. It is just enough for 3 or 4 people.
1lb shrimp, peeled and deveined
1/4 c coarsely chopped onion
4 large tomatoes, in 1-1.5" chunks, preferably half green or mostly green
4 cloves of garlic + 2 cloves for marinating the shrimp
1 green onion, sliced
1/2 a light-colored beer (Corona, Coors, etc)
1 TB chopped fresh parsley
a small pinch of thyme
1c of grits (old fashioned, NOT quick cooking or instant)
2c of chicken broth (I didn't have any, so I used water and 1 pack of Goya bouillon)
1-1/2c milk (skim is just fine, that is what I used)
1-1/2c water + about 1/2c or so extra in case the grits thicken too much during cooking
1 TB secret ingrdient (don't worry, it's still great without it, but I'll keep this one a secret)
*Bear in mind that I don't actually measure the dry seasonings, add it until it's good :P*
1/2 tsp paprika
1/8 tsp cayenne pepper
1/4 tsp garlic powder
1/4 tsp onion powder
salt and pepper to taste (salt generously because grits tend to suck up flavor)
1/2c shredded cheddar cheese
Procedure
1. Place peeled, deveined, and rinsed shrimp into a medium size bowl. Sprinkle a generous amount of salt (much more than you would season them with) over all over shrimp. Toss the shrimp in the salt with your hands in a slight rubbing motion until they begin to foam slightly. Once you begin seeing small foaming or bubbles, this takes 2-3 minutes, rinse the shrimp again.
2. Once rinsed, allow the shrimp to marinade in a little salt, two cloves of minced garlic and the sliced green onion. Be sure to wipe off the marinade before cooking to avoid burning the seasoning. Simply add the remaining marinade when it is time to add the green onion.
3. Prepare the grits according to the instructions, except be sure to remove the lid and whisk the grits for a minute about 3 or 4 times during the process to create creamier, smoother grits. Be sure to add in the seasoning after initially whisking the grits into the boiling liquid. If the grits get thick, add a little water here and there. I probably added an extra half a cup of liquid by the end.
4. Once the grits are done, stir in the cheddar and continue cooking 1-2 minutes to incorporate the cheese.
5..Saute the onions in a pan over medium low heat in a generous amount of oil, about 2TB or so.
6.. Once the onions are transparent, but not yet softened, add in the green tomatoes, if you are using them. If you have red, do not add them yet. Add garlic and stir occasionally.
7. Meanwhile, in a pan over high heat that has been lightly oiled, saute shrimp for 1-2 minutes on each side. Do not overcook! Once cooked, set aside.
8. Once the onions are almost completely softened, add in the red tomatoes and thyme. Sautee for one minute or so. Add the green onion.
9. Increase the heat to medium and add in the beer. Continue sauteing until the beer has cooked off. Be sure to adjust salt and pepper as needed at this point.
10. Add the shrimp to the sauce and sautee for a minute or two.
Ingredients
*If you like leftovers or have a larger, double this recipe. It is just enough for 3 or 4 people.
1lb shrimp, peeled and deveined
1/4 c coarsely chopped onion
4 large tomatoes, in 1-1.5" chunks, preferably half green or mostly green
4 cloves of garlic + 2 cloves for marinating the shrimp
1 green onion, sliced
1/2 a light-colored beer (Corona, Coors, etc)
1 TB chopped fresh parsley
a small pinch of thyme
1c of grits (old fashioned, NOT quick cooking or instant)
2c of chicken broth (I didn't have any, so I used water and 1 pack of Goya bouillon)
1-1/2c milk (skim is just fine, that is what I used)
1-1/2c water + about 1/2c or so extra in case the grits thicken too much during cooking
1 TB secret ingrdient (don't worry, it's still great without it, but I'll keep this one a secret)
*Bear in mind that I don't actually measure the dry seasonings, add it until it's good :P*
1/2 tsp paprika
1/8 tsp cayenne pepper
1/4 tsp garlic powder
1/4 tsp onion powder
salt and pepper to taste (salt generously because grits tend to suck up flavor)
1/2c shredded cheddar cheese
Procedure
1. Place peeled, deveined, and rinsed shrimp into a medium size bowl. Sprinkle a generous amount of salt (much more than you would season them with) over all over shrimp. Toss the shrimp in the salt with your hands in a slight rubbing motion until they begin to foam slightly. Once you begin seeing small foaming or bubbles, this takes 2-3 minutes, rinse the shrimp again.
2. Once rinsed, allow the shrimp to marinade in a little salt, two cloves of minced garlic and the sliced green onion. Be sure to wipe off the marinade before cooking to avoid burning the seasoning. Simply add the remaining marinade when it is time to add the green onion.
3. Prepare the grits according to the instructions, except be sure to remove the lid and whisk the grits for a minute about 3 or 4 times during the process to create creamier, smoother grits. Be sure to add in the seasoning after initially whisking the grits into the boiling liquid. If the grits get thick, add a little water here and there. I probably added an extra half a cup of liquid by the end.
4. Once the grits are done, stir in the cheddar and continue cooking 1-2 minutes to incorporate the cheese.
5..Saute the onions in a pan over medium low heat in a generous amount of oil, about 2TB or so.
6.. Once the onions are transparent, but not yet softened, add in the green tomatoes, if you are using them. If you have red, do not add them yet. Add garlic and stir occasionally.
7. Meanwhile, in a pan over high heat that has been lightly oiled, saute shrimp for 1-2 minutes on each side. Do not overcook! Once cooked, set aside.
8. Once the onions are almost completely softened, add in the red tomatoes and thyme. Sautee for one minute or so. Add the green onion.
9. Increase the heat to medium and add in the beer. Continue sauteing until the beer has cooked off. Be sure to adjust salt and pepper as needed at this point.
10. Add the shrimp to the sauce and sautee for a minute or two.
Thursday, June 21, 2012
Eastern-North-Carolina-Inspired Vinegar BBQ Sauce
Who doesn't love a good Eastern NC style vinegar-based BBQ sauce? We had tons of pulled pork from huge pork butt around the house that I'd done tons of things with--arepas,pupusas, sopes--and I was starting to get a bit tired of it. Finally, I decided to go ahead and make a nice sauce and make a sandwich the old fashioned way.
This NC-inspired sauce is sure to be a favorite. It's tangy, spicy, and a little sweet. More than anything, let's not forget that you can make it in a flash! The two secrets to my version are a touch of ketchup, which is anything but traditional, Worcestershire, and molasses, another twist I brought in. The ketchup creates an additional layer of sweet tangy-ness, while the Worcestershire and molasses provide some added depth of flavor. A tinge of garlic flavor rounds out the great flavor of my Carolina vinegar BBQ sauce. Enjoy!
Ingredients
1 cup cider vinegar
1 generous TB red pepper flakes
2 TB brown sugar
1 tsp ketchup
1 tsp salt
1/4 tsp cayenne pepper
1/4 tsp Worcestershire sauce
1/8 tsp molasses
1/2 tsp black pepper
1 garlic clove, split (remove this once enough garlic flavor infuses into the sauce
Procedure
Place all ingredients in a non-reactive sauce pot over medium heat. Bring to a boil, stirring occasionally, to allow sugar to dissolve and flavors to blend.
Remove from heat Allow the sauce to cool to room temperature and enjoy. It's as simple as that! Since this sauce is vinegar-based it will keep well too. What more could you ask for?
*This sauce is best when stored at room temperature*
This NC-inspired sauce is sure to be a favorite. It's tangy, spicy, and a little sweet. More than anything, let's not forget that you can make it in a flash! The two secrets to my version are a touch of ketchup, which is anything but traditional, Worcestershire, and molasses, another twist I brought in. The ketchup creates an additional layer of sweet tangy-ness, while the Worcestershire and molasses provide some added depth of flavor. A tinge of garlic flavor rounds out the great flavor of my Carolina vinegar BBQ sauce. Enjoy!
Ingredients
1 cup cider vinegar
1 generous TB red pepper flakes
2 TB brown sugar
1 tsp ketchup
1 tsp salt
1/4 tsp cayenne pepper
1/4 tsp Worcestershire sauce
1/8 tsp molasses
1/2 tsp black pepper
1 garlic clove, split (remove this once enough garlic flavor infuses into the sauce
Procedure
Place all ingredients in a non-reactive sauce pot over medium heat. Bring to a boil, stirring occasionally, to allow sugar to dissolve and flavors to blend.
Remove from heat Allow the sauce to cool to room temperature and enjoy. It's as simple as that! Since this sauce is vinegar-based it will keep well too. What more could you ask for?
*This sauce is best when stored at room temperature*
Saturday, June 2, 2012
Southern Browned Flour Gravy
My grandmother would always make a quick browned flour gravy to go along with our hoe cakes. This is a very simple gravy that does not require meat broth and tastes great with fresh, fluffy hoe cakes.
Ingredients
flour
a few TB butter
milk to reach desired texture
desired seasoning (salt, pepper, Lawry's seasoned salt, sage, rosemary, garlic cloves, onion, etc)
Procedure
1. Brown flour in an ungreased pan over medium-low heat until it reaches a color very similar to cocoa powder, a light reddish brown.
2. Once flour is browned, add in any butter that you will be using for flavoring and stir until homogeneous. Incorporate any spices at this point as well. If you are adding onion, cook until soft.
3. Gradually stir in milk until desired consistency is reached, bearing in mind that the gravy will thicken.
4. Bring the gravy to a boil for about 1-2 minutes, until thickened. If too thick, add additional milk and stir until homogeneous. Serve.
Ingredients
flour
a few TB butter
milk to reach desired texture
desired seasoning (salt, pepper, Lawry's seasoned salt, sage, rosemary, garlic cloves, onion, etc)
Procedure
1. Brown flour in an ungreased pan over medium-low heat until it reaches a color very similar to cocoa powder, a light reddish brown.
2. Once flour is browned, add in any butter that you will be using for flavoring and stir until homogeneous. Incorporate any spices at this point as well. If you are adding onion, cook until soft.
3. Gradually stir in milk until desired consistency is reached, bearing in mind that the gravy will thicken.
4. Bring the gravy to a boil for about 1-2 minutes, until thickened. If too thick, add additional milk and stir until homogeneous. Serve.
Subscribe to:
Posts (Atom)